MENU
MENU


Floor is the noisiest part of a car. It transmits the suspension squeaks, noise of wheels and etc. Apart from that, floor is a big chunk of metal, which makes it very much exposed to vibrations. All of it adds certain discomfort to your everyday driving. What makes it even worse is that it is harmful for vehicle itself. With that said, car floor insulation is definitely not a compulsory thing you have to do but it’s a highly recommended step in a process of sound deadening.
Floor sound deadening performs number of functions at once. To begin with, it cuts the vibrations. It is a special vibration absorption material that is used for these purposes (consider our Noico 2mm). As a result, vehicle’s body becomes more solid and integral. Layer of noise insulation material cuts an outside noise without letting it penetrate into interior space (this is the case of our Noico Red 4mm). Another additional benefit of sound deadening is a thermal (heat & cool) insulation, which is pretty important when it comes to faster cooling, heating and preserving your a/c inside of your interior.
These are the tools that you would need to soundproof an interior of your car by yourself:

- sound Deadening material
- noise and heat insulation material
- roller
- knife and scissors
- measuring tape and pencil
- cardboard for making the templates
- degreaser
- cloth for wiping
- brush or vacuum cleaner
- some tools to disassemble the interior trimming
Once the material is here, we can get the work started. First thing you need to do is to unplug your battery. Next step is to carefully take off all elements that are currently covering the floor – seats, carpeting, trimming, etc. All fastening hardware, such as bolts, nuts, self-tapping screws should be kept in a separate box as they often get lost. Mark the floor wirings with stickers and avoid twisting of wires as it could get damaged in a future. It is not necessary to take off a dashboard if you do a floor insulation-it won’t interfere with a process.
Here is a sequence of steps to be taken to make the good floor sound deadening
– Carefully clean the floor off the dirt and dust, followed by degreasing of the surface.
– For sound deadening of complex surfaces, it is recommended to prepare templates made of cardboard. Watch out for mounting spots so they match. You are likely to encounter certain issues if you make mounting holes during the work.
– Cut the material out according to templates if it’s your first time doing a sound deadening by yourself. Please note that it’s fairly hard to achieve quality results and neat binding without using the templates.
– Apply a pattern to the floor and make sure that all holes match.
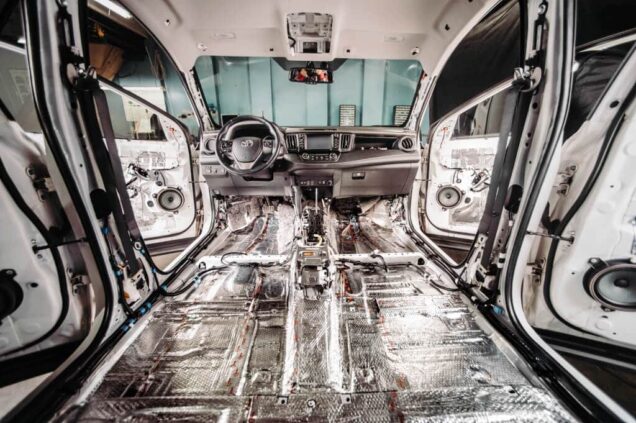
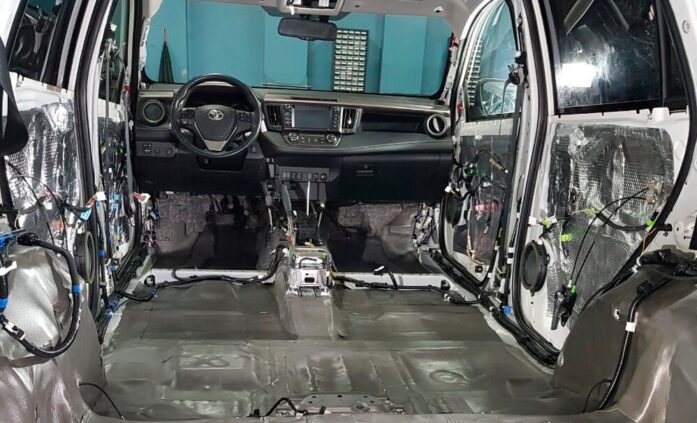
– Sound deadening mat has to be of indoor room temperature. If material was kept in a cold environment then heat it’s backside and apply it to the surface. Press the material with a roller to avoid air bubbles. Make the highest possible overlap of material to a firewall, all the way up to dashboard. If possible, cover all technical cavities that wirings are running through. The material is best installed when sheets are laid back to back to each other. That will prevent moisture from penetrating to body of a car.
– Be sure to properly press down all material with a roller. That will ensure a correct adhesion.
– Install heat and noise insulation foam over the layer of sound deadening mat. Please bear in mind that the layer of material under the pedals shouldn’t be excessively thick as it could interfere with pedal pressing operations. Same goes for seat mounting spots and interior trimming.
– Put the interior back together in reverse sequence. During the assembly process, watch out for mounting spots and elements that might have gaps and produce squeaks. Tighten the connection to avoid squeaking and hammering.
If work done neatly and correctly then you are likely to stop hearing noise of wheels at highway, engine buzz and other sounds caused by vibrations. However, in order to achieve a complete silence or almost complete silence then you would have to commit to full sound deadening, which would include a soundproofing of other elements of body.
In proof of what was stated above, here is some feedback from car owners who had already soundproofed the floor of their cars
«That intrusive buzz is no longer there when I drive on a highway. I even get less tired after a long driving. Certainly worth the time and efforts»
«I’ve got serious sound improvements after I had sound deadening installed to my Toyota. The sound got cleaner and louder.… Not to mention the rattle that was there during a driving. Now it is night and day difference».
«I’ve managed to achieve my objectives with this product. It even appears that my car is 1 class higher now».