MENU
MENU


Nowadays, we are surrounded by lots of external noises that may annoy the driver and deteriorate his concentration on the road; besides, unwanted sounds lead to fatigue while driving. This is why most drivers take a thought of getting rid of these noises and install the full set of sound deadening materials in their cars.
Japanese SUV Toyota Rav 4 don’t have complete sound deadening by default, so most drivers add it as an option at service centers, or install by themselves to achieve silence and convenience while on the road. Moreover, this improvement may significantly enhance heat insulation — the heat will be better preserved in winter and A/C cool will not escape in summer.
To equip Toyota Rav 4 with soundproofing and heat insulation, we will use Noico 2mm (80mil) sound deadening material and Noico Red 4mm (150mil) sound and heat insulation material — we have selected them on Amazon, based on ratings and positive buyers’ feedback. We will also need some additional tools: such as a clip remover (highly advisable), ruler or tape for templates measurement, pencil for marking, scissors or utility knife for slicing materials using templates, roller, gloves, degreaser and dry cloth, and screwdrivers and nut drivers for compartment dismantling.
During our work, we will work with the following components of the car: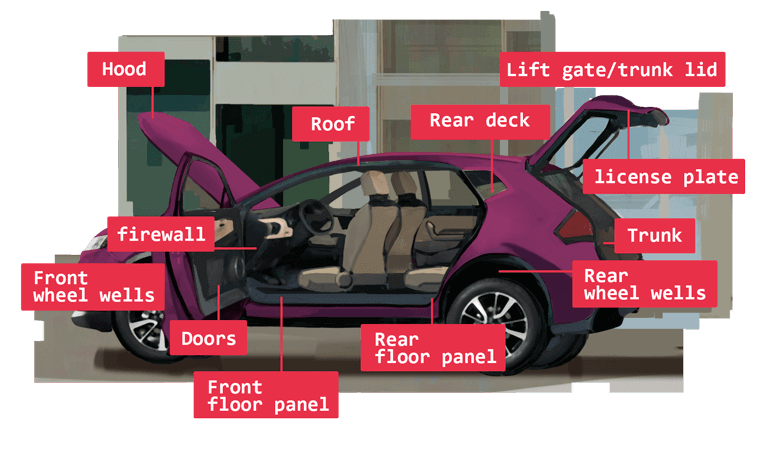
The first layer will consist of sound deadening material, with heat and sound insulation material to occupy the second one — this way we will reach the best possible effect.
Before installing, we first need to prepare the car
For that, we have to visit a carwash service in order to get rid of dust and dirt. Then, we arm ourselves with the user manual (find it on the Internet) and learn how to dismount door trimming and where the clips are located. Dismantle door trimming cautiously and remove them; be careful with clips — you’d better use a special remover. Then remove the protective layer from doors and degrease the interior part of the door aperture. Large dimensions of technological apertures of Rav 4 are what relieves us from the necessity of removing speakers, as we already have access to the entire interior part of the door. Therefore, it’s quite easy to cover the whole door and roll down the sound deadening material.
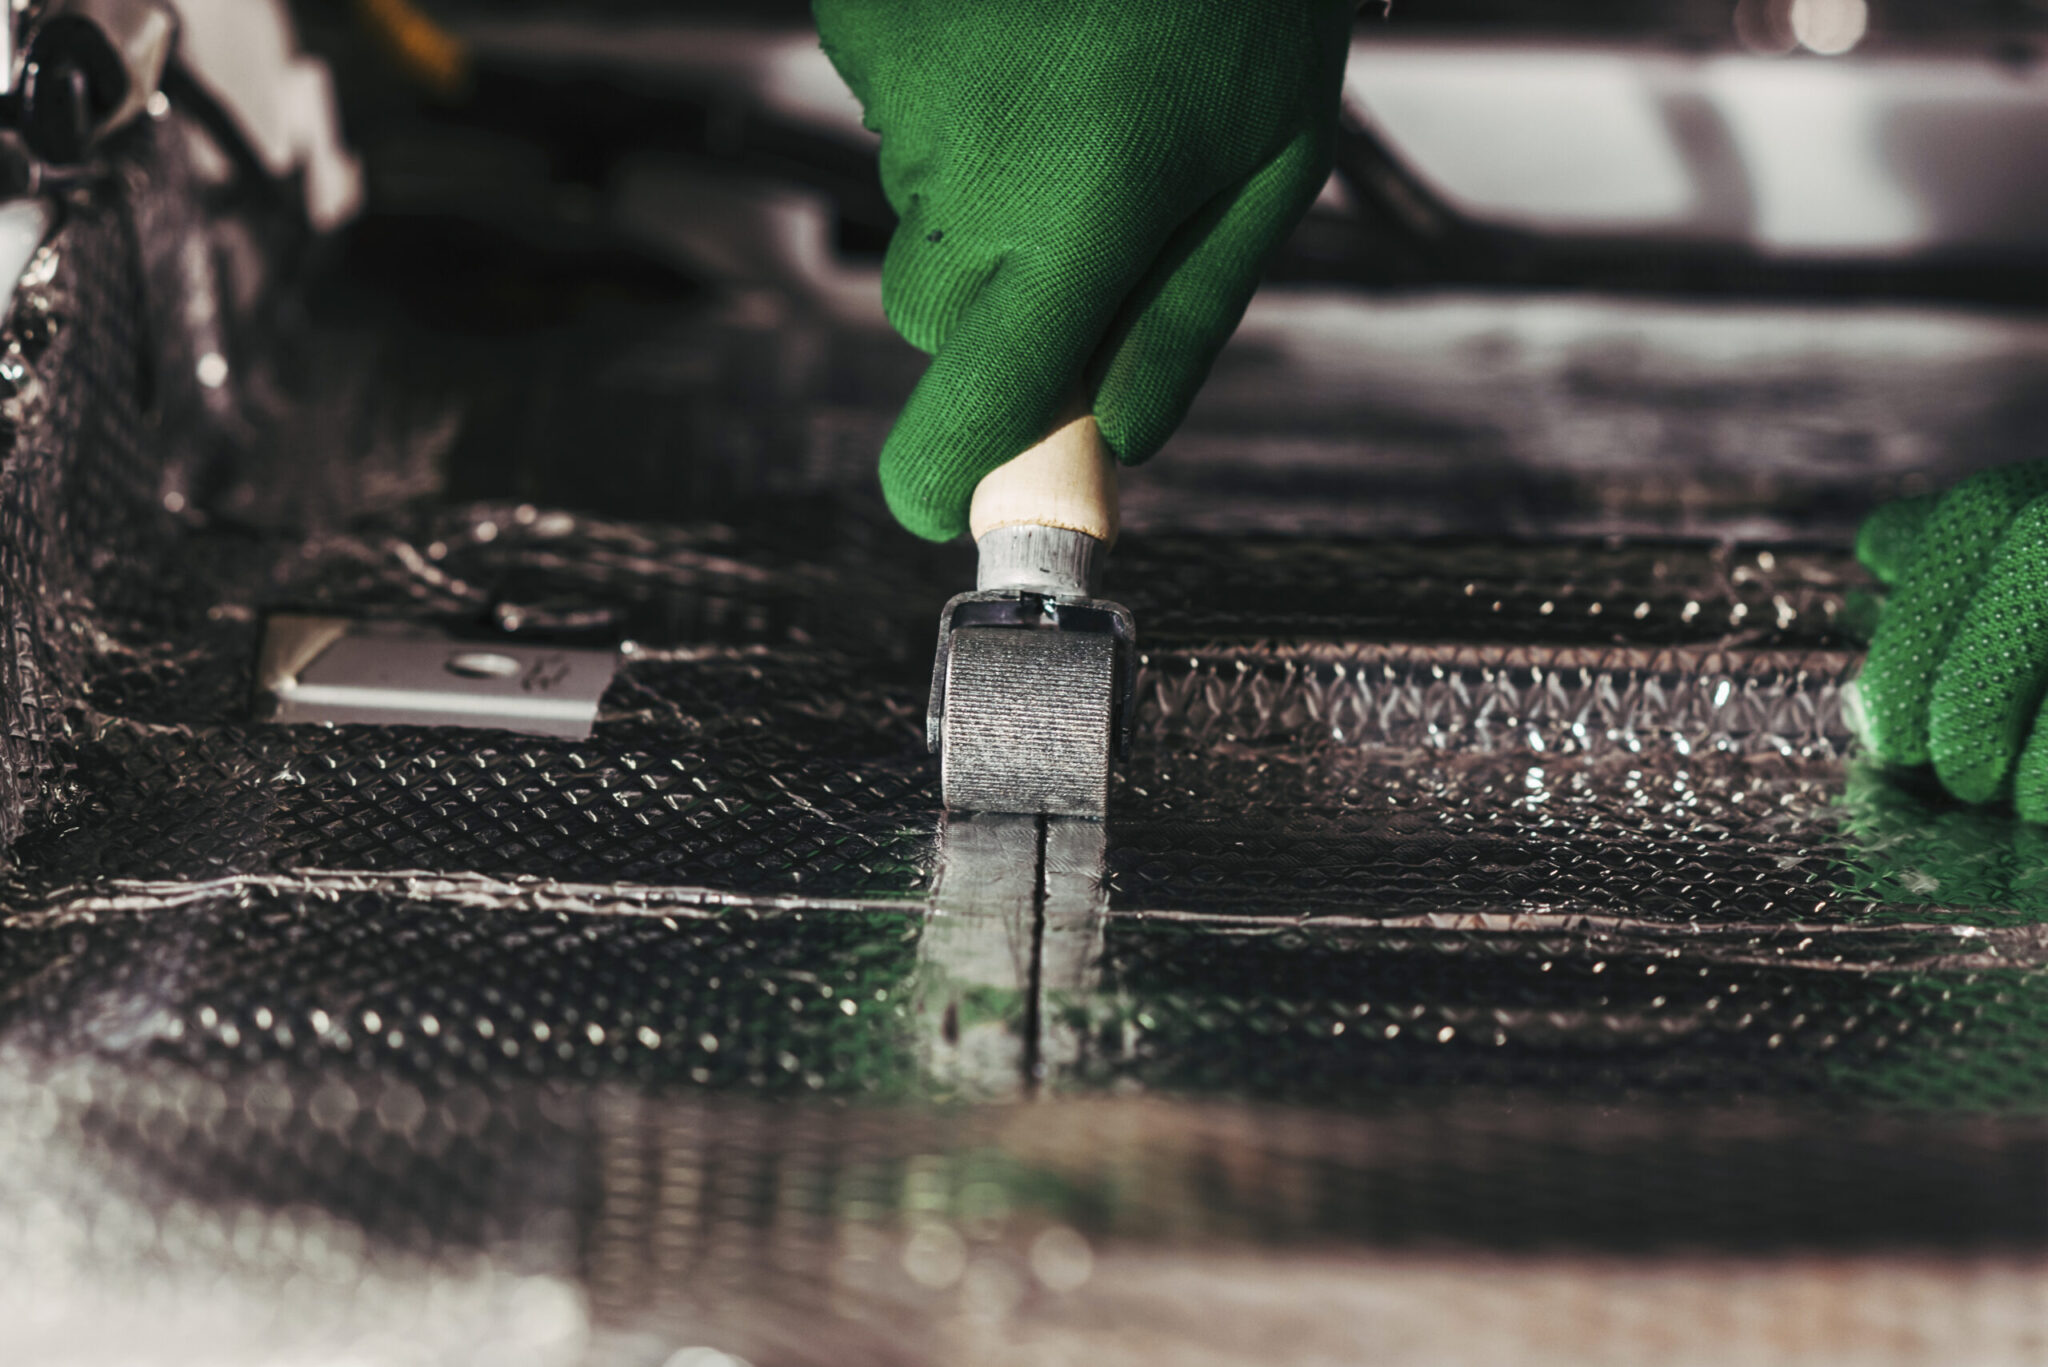
 Then we take the ruler to measure the interior part of the door, cut the template in the material based on these dimensions. Then, having removed the protective layer from the material, stick it to the interior part of the door. After that, level it in place and roll it down elaborately, to remove all bubbles from under the piece of material. It is special embossing on the foil that lets us see where the material is rolled down well and where not.
We heavily recommend you to make sure the whole sheet is rolled down properly
To build in the second layer, we have to degrease the first one again and then stick Noico Red 4mm (150mil) on it. This heat and sound insulation layer should be applied without any openings or gaps between sheets, in order to preclude the possibility of sound intrusion and ensure as high heat insulation as possible.
Then we cover the exterior metal surface of the door with the sound deadening material. Stick down all the apertures, including those narrow designed for wires and door lock arms. This layer should be carefully rolled down as well.
Repeat these operations on other doors
 After that, refer to the floor dismantling part of the user manual and follow it, removing seats with side and floor trimming. Try to keep side-covering clips undamaged while dismounting! To avoid losing bolts, screws and screw nuts, put them where they should be without tightening after you have removed the seats — this will let us see where element anchors are located in order not to cover them with the material.
Now we need to degrease the entire surface (if needed), then we cut templates and apply Noico 2mm (80mil) sound deadening material on the floor, rolling it down very carefully. You should stick the material under the dashboard as elaborately as possible, try to apply it closer to the dashboard and cover all technological apertures designed for wires and arms. Also, pay special attention to sticking wheel arches (from interior side), since this is the major area where outside noises intrude the compartment.
It is recommended to stick arches with the double layer of the sound deadening material
Then, degrease the first layer and apply Noico Red 4mm (150mil) as the second one, in order to reduce the road and exhaust noise, and enhance heatproofing of the interior.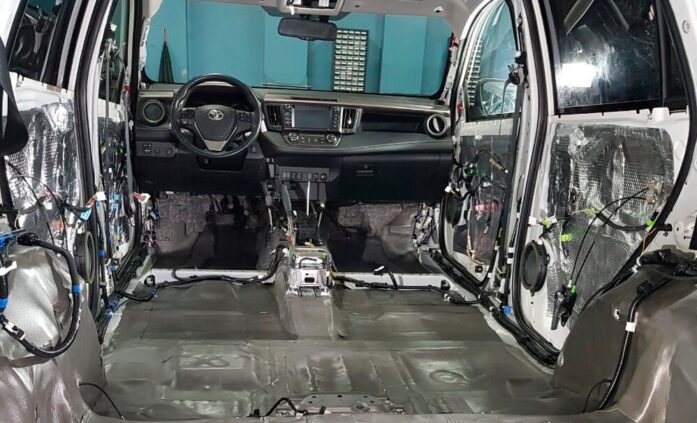
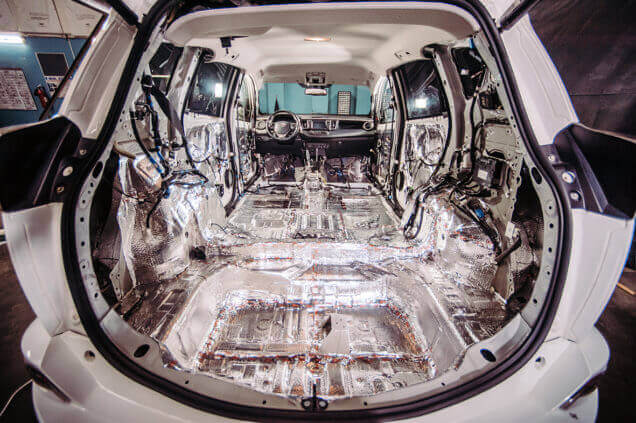
The same way as the floor, work with the trunk. Following the user manual, dismantle the trunk and remove the trunk lid covering. Degrease the surface and stick down all the metal parts with Noico 2mm (80mil) sound deadening material. Pay special attention to caves on the left and the right. They should be stuck down, with thrusting the material into the cave — as deeply as your hand and roller will allow. After applying the first layer, degrease it and apply heat and sound insulation material as the second layer. Do not forget that is must be stuck down with no gaps between sheets.
Continuing with the roof. Having dismantled it, move it down almost to the floor. You don’t have to remove it. Then degrease the ceiling surface and stick it down with Noico 2mm (80mil) between the reinforcing elements. The best way is to measure the roof and prepare sheet templates beforehand, and then cut the material using them. After applying the first layer, degrease it and stick Noico Red 4mm (150mil) sound and heat insulation on it.
Having ensured that all the automobile parts are processed properly and no gaps are left, assemble the car in the reversed order.
Mount the roof, then floor with the trunk and trunk lid, fit plastic panels and seats, and then mount the doors.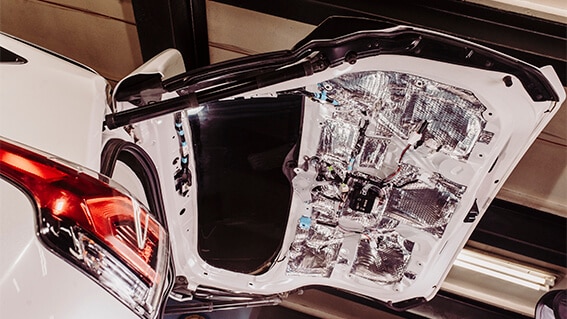
Our automobile is ready and now turned to be way more comfortable
Soundproofing will protect you from external noises and unwanted sounds; road, tires, and engine noise will be significantly reduced, and the car will be warmer in winter and cooler in summer. You will also see your music play louder, especially at the bass. All that comes because of 2 layers of soundproofing that solve various acoustic comfort issues.
Enjoy your automobile the whole-new way!